
위 영상을 보고 정리한 내용입니다.
Container란?
Process 격리를 기반으로 하는 application 전달 메커니즘
*Container vs Virtual Machine

VM이 독립적 OS를 가지고 동작하는 반면에, Container는 Host OS 위에서 process 단위로 동작한다. 모든 container는 격리되며, 개별 파일 시스템을 가지고 동작하게 된다. 또한, 필요한 내용만 Bins/Libs에 저장되어 사용되기 때문에 가볍다는 장점이 있다.
Docker란?
Container 기반의 오픈소스 가상화 플랫폼
Container 관리 프로그램이라고 생각하면 된다.
Registry에 Image를 저장해 뒀다가, 사용이 필요한 경우 Docker Host에 불러서 Container를 run하는 구조이다. Docker에는 일반적으로 많이 사용되는 Nginx나 Ubuntu같은 이미지를 가지고 있어 사용에 용이하다는 장점이 있다. 또한, Docker는 Multiple layer 구조로 이루어져 있기 때문에, 빠르게 동작할 수 있다.
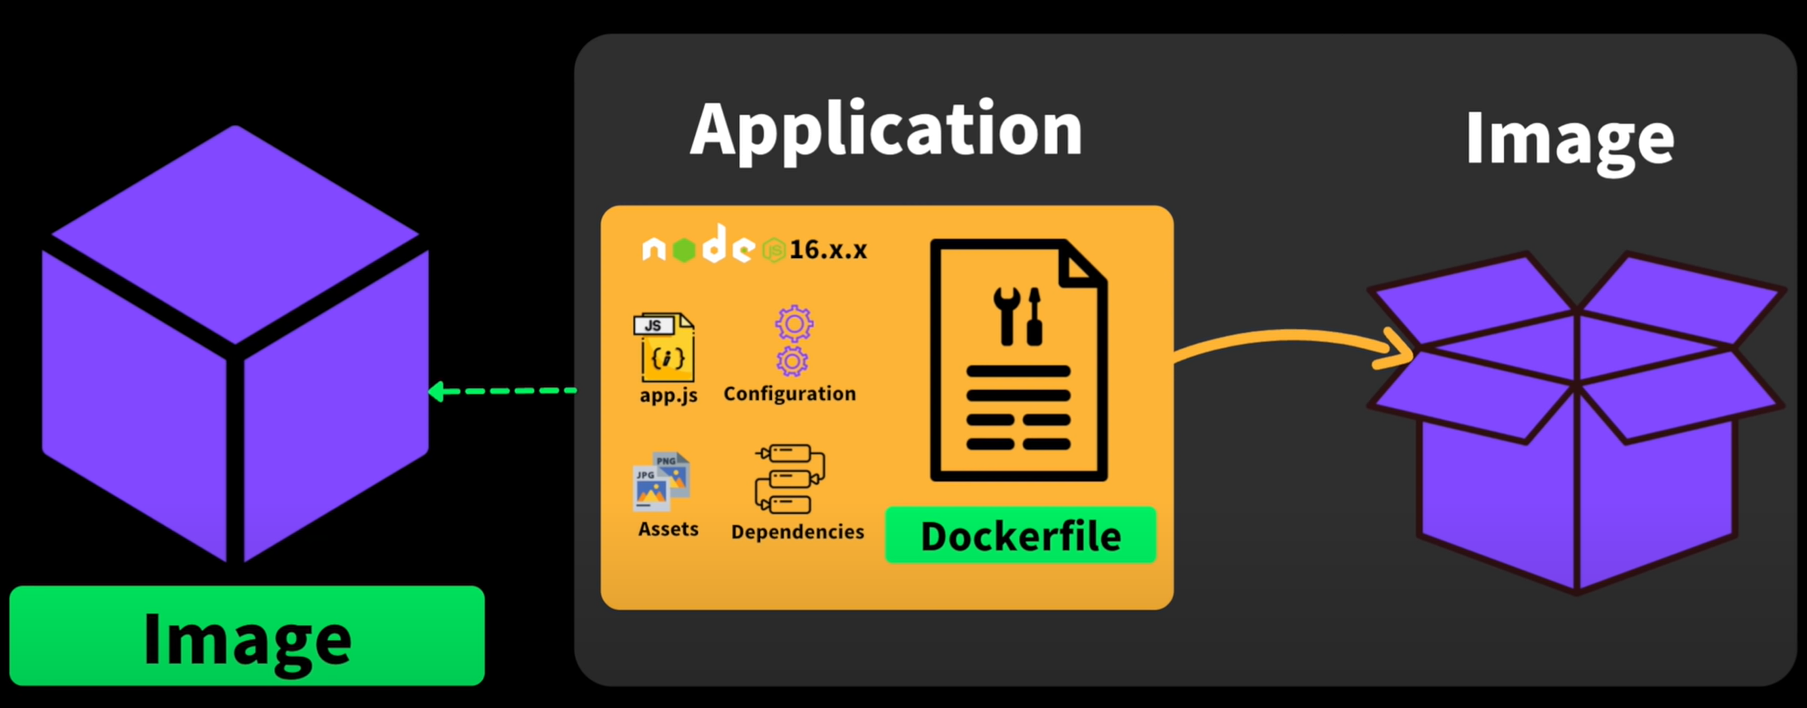
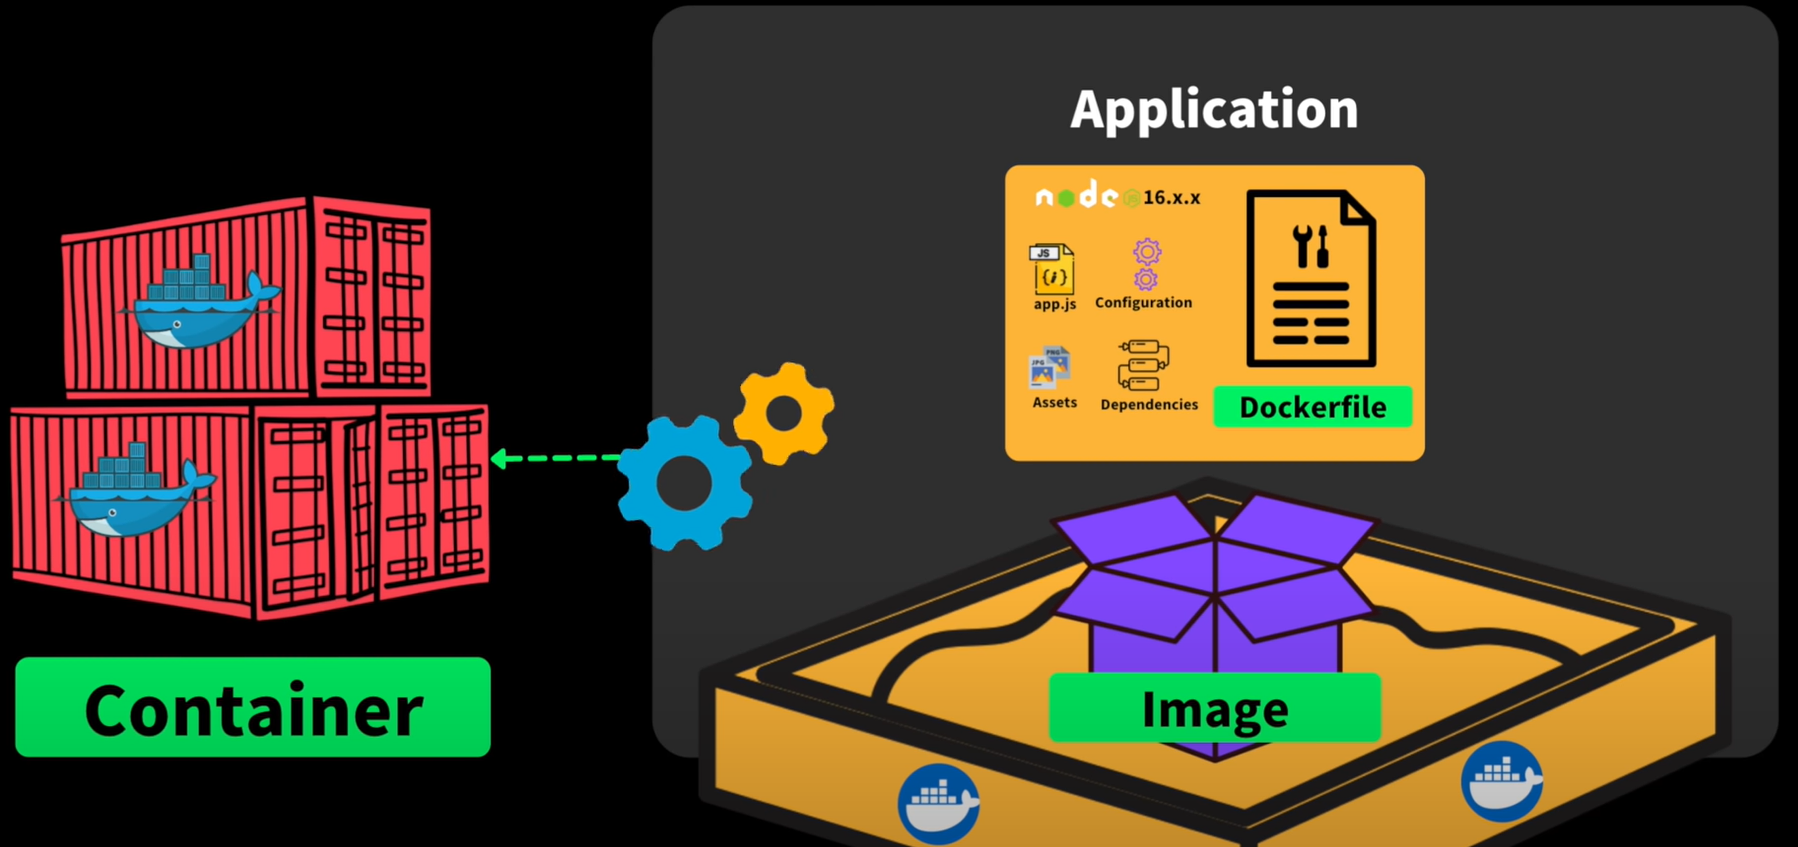
*도커 3 요소(순서)
Dockerfile -> Image -> Container
*도커 배포 과정

Git과 유사한 과정으로 사용된다. Container registry는 public과 private이 있으며, public으로는 dockerhub, red hat, github packages가 있고 private으로는 aws, google cloud, microsoft azure가 있다.
실습
1. Docker 설치
Docker: Accelerated, Containerized Application Development
Docker is a platform designed to help developers build, share, and run modern applications. We handle the tedious setup, so you can focus on the code.
www.docker.com
2. Docker 예제 프로그램 만들기
영상에서는 서버 프로그램을 하나 만들어서 사용한다. 폴더 하나를 만들고 터미널 창을 열어서 node 환경을 준비한다.
$ npm init -y
$ npm i express
index.js 파일 하나를 생성한다.
const express = require("express");

const app = express();

app.get("/", (req, res) => {
    res.send("Dreamcoding example!");
});

app.listen(3000, () => {
    console.log("Server is running!");
});
localhost:3000에서 '/'로 접속하면 "Dreamcoding example" 메시지를 보내주는 간단한 서버 프로그램이다.
다시 터미널 창으로 돌아가, 서버를 시작한다.
$ node index.js아래의 메시지가 터미널 창에 나온다면 성공적으로 서버를 동작한 것이다.
Server is running!
웹 브라우저를 열어서 "http://localhost:3000/"에 접속해본다.
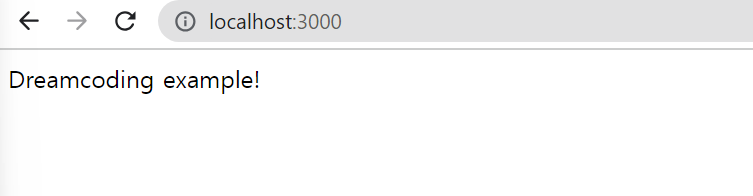
위와 같은 화면이 나오면 서버가 잘 동작하고 있는 것이다.
3. Dockerfile 생성
이미지 내용을 저장하는 파일이다. Dockerfile을 생성한다.
FROM node:16-alpine

WORKDIR /app

COPY package.json package-lock.json ./

RUN npm ci

COPY index.js ./

ENTRYPOINT [ "node", "index.js" ]
FROM : Base-image를 설정한다.
WORKDIR : cd라고 보면 된다.
COPY : 이미지에 파일을 저장한다.
RUN : shell처럼 명령어를 수행한다.(빌드시)
ENTRYPOINT : 지정된 명령어를 수행하며, 이 프로세스가 종료되면 container가 종료된다.
이 외에도,,
CMD : 이미지 실행 시 디폴트 커맨드나 파라미터를 설정한다.
EXPOSE : Container의 listening port나 protocol을 설정한다.
ENV : 환경 변수를 설정한다.
ARG : 빌드 시 넘어올 수 있는 인자를 설정한다.
(자세한 설명: 포스팅)
4. Image 생성
우선 docker desktop을 실행한다.(켜져 있으면 pass)
터미널 창을 다시 켜서 아래의 명령어를 입력해준다.
$ docker build -f Dockerfile -t sample-docker .-f : build할 도커파일을 정한다.
-t : 도커 컨테이너의 이름을 정한다.
마지막 : 명령어를 수행할 경로
생성한 이미지를 확인하려면, 다음의 명령어를 입력하면 된다.
$ docker images그러면, 다음처럼 확인할 수 있다.

5. Docker Image 실행 (Container)
$ docker run -d -p 3000:3000 sample-docker-d : 도커 이미지를 background에서 실행한다.
-p : Host와 Container의 포트를 연결한다. (Host port : Container port)
포트 매핑을 하는 이유는 다음과 같다. Host는 하나인데 Container는 여러 개일 수 있기 때문이다.
실행되고 있는 컨테이너를 확인하기 위해서는 다음의 명령어를 사용한다.
$ docker ps
컨테이너의 로그를 확인하고 싶으면 다음의 명령어를 사용한다.
$ docker logs "container id"아니면 docker desktop에서 확인할 수 있다. docker desktop을 이용해 컨테이너의 터미널도 실행할 수 있다.
실행을 중지하려면 stop을 이용하면 된다.
$ docker stop "container id"
6. Image 배포하기
# dockerhub 이용하기 (public)
Docker Hub Container Image Library | App Containerization
Deliver your business through Docker Hub Package and publish apps and plugins as containers in Docker Hub for easy download and deployment by millions of Docker users worldwide.
hub.docker.com
위 링크에 들어가서 회원가입 후, repository를 만들어 준다.
위 레포지토리에 우리가 만든 이미지를 올려줘야 하므로, 우선 도커 이미지의 이름을 레포지토리와 같게 만들어야 한다.

레포지토리의 이름 옆에 ushin20/docker-example로 아까 만들었던 도커 이미지의 이름을 변경한다.
$ docker tag sample-docker:latest ushin20/docker-example:latest
docker images를 통해 잘 만들어졌는지 확인한다.
$ docker images
REPOSITORY               TAG       IMAGE ID       CREATED          SIZE
ushin20/docker-example   latest    8e0d3e422d47   38 minutes ago   122MB
sample-docker            latest    8e0d3e422d47   38 minutes ago   122MB
push하기 위해서 도커에 로그인한다. 명령어는 login이다.
$ docker login
Username : ushin20
Password :
마지막으로 push해준다.
$ docker push ushin20/docker-example:latest
The push refers to repository [docker.io/ushin20/docker-example]
3aab39b5d120: Pushed
0bda52fedb29: Pushed
ee3d19416ab6: Pushed
e7a0a1d06ce4: Pushed
7b71a9bb851a: Mounted from library/node
323c772d0cd8: Mounted from library/node
87820ee0191d: Mounted from library/node
78a822fe2a2d: Mounted from library/node
latest: digest: sha256:c7b035400a0283d368e7c7ce5b747e90fa09d891d643b4b856f34429126859f6 size: 1990
7. <none> 이미지 삭제하기
기본적인 명령어는 다음과 같다.
$ docker rmi $(docker images -f "dangling=true" -q)
stopped container에서 사용중이라고 메시지가 나오는 경우, 이미지가 삭제되지 않는다. 다음의 명령어를 통해 해결할 수 있다.
- 강제로 이미지 지우기
$ docker rmi -f $(docker images -f "dangling=true" -q)- stopped container 지우고 위 명령어로 이미지 지우기
$ docker rm $(docker ps --filter status=exited -q)
'잡기술 > Cloud' 카테고리의 다른 글
| Kubernetes (2) | 2023.07.20 |
|---|